Dolly Upgrade
Justas Motuzas
17th May 2013
We’ve had the camera dolly for a while now and it’s been really useful in film work, helping to achieve interesting cinematic results. We wanted to add a motor for longer time-lapse panning shots and eliminate any undesirable vibration. This was a good opportunity for us to tinker with motors, as well as explore the ferric chloride etching process for making circuit boards. The first test is below.
Driving setup
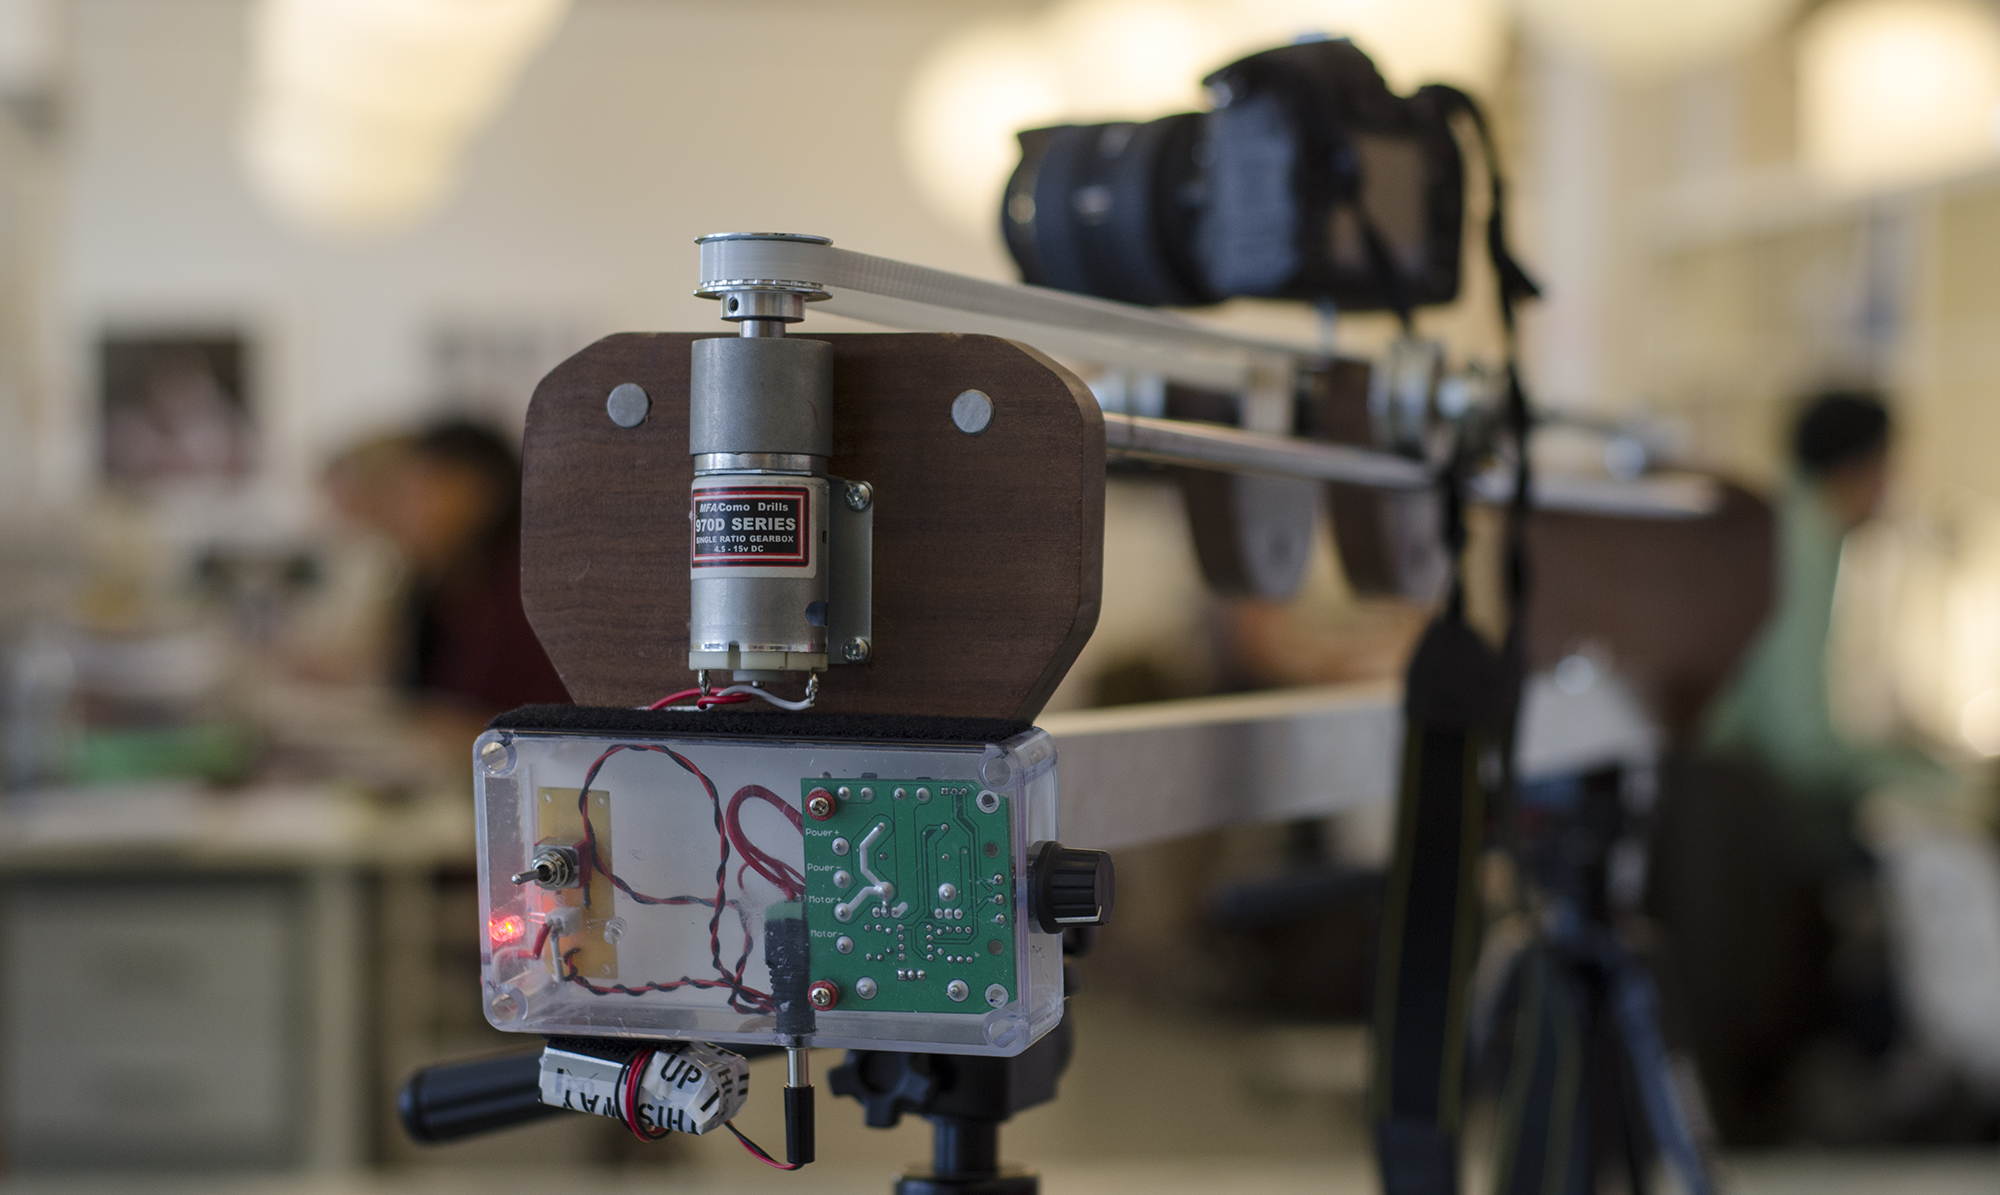
We took a 21.2W 156:1 geared DC motor which we’ve had on our shelf for a while and added a T5 timing pulley and belt combination.
One of our aims was to be able to control motor speed and direction. Luckily we already had a PWM motor regulator module which helped to solve variable speed problem.
To be in control of the direction in which the camera moves, we decided to use a ‘DPDT'(ON-OFF-ON) switch and two LEDs indicating direction in which the dolly is moving


PCB Etching
The ferric chloride etching process proved to be quite effective for making a simple circuit board. After printing out the design, we ironed the transfer toner onto a copper plated board. Then with a fifteen minute ferric chloride bath and a tiny bit of careful drilling, we were left with this:

And here’s how it looks, soldered and boxed up:

We hope to share some more footage soon and get some nice applications out of it.
(Feel free to get in touch if you have any questions.)